Current news: All preseason orders placed before July 31st will be shipped starting the third or forth week of September, 2023. All garlic orders placed after August 1st will be shipped in October.
Please order your organic garlic seed varieties soon as they sell out very quickly! Use this handy month by month guide to help you learn how to grow garlic in your garden. Growing garlic is fun for the whole family and we are happy to help you grow your own organic garlic seed. Our gourmet organic garlic can either be eaten or used for planting garlic stock in the fall.
Note: See our Photo Gallery for a sequential view of the garlic season.
Quick links to each month:
January
Ordering Garlic begins now!
We have started taking preseason organic garlic seed orders on January2nd! Many of our gourmet garlic varieties sell out quickly, so January is the perfect time to start planning your fall garlic garden. Please order garlic now for best selection. All orders will be shipped in the fall just in time for fall planting. In the garlic garden… Depending on where you live will determine when your garlic plants will begin appear out of your soil. In many northern states, the garlic may still be covered with snow as with most of the country during the winter.
No matter what the weather pattern is our garlic plants here in the northwest begin to emerge late January through early February.
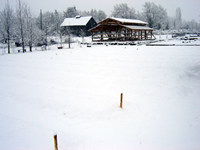
January
February
Have you ordered your garlic for the fall garlic planting season yet?
Hopefully you have already placed your order of garlic, so you can stop worrying and start dreaming about your beautiful garlic seed that will arrive to your home and garden for fall planting! Don’t be disappointed by waiting too long to place your garlic order and missing out on some of your favorite varieties…
In the garlic garden… The garlic plant will be anywhere from the first leaves just emerging through the soil, to four inches tall, depending on your climate and the garlic variety.
People often ask about new garlic plant growth and frost damage… The answer is “no”, frost will not damage your new garlic plants. Garlic is very hardy and the garlic plants can handle extremely cold temperatures. Growing garlic in the Northwest we tend to have some warm weather in January and February, so our garlic plants may have big growth spurts. Then when the weather turns cold again the tips of the garlic plants get exposed to snow and frost. There is no need to worry about the frost damaging your new garlic plants. It may turn the tips of the green plants yellow, but it does not harm the growth of your garlic plant.
If your plants are taller then 4 or 5 inches and you know a hard frost is coming, you could add some extra mulch to get through the cold spell. Just be sure to clear it away when the weather gets warm and the days start to get longer. Allowing the garlic plant to get all the sunshine it can while the days are still short.
Sometimes we have to clear away excess mulch that is depriving the garlic plant from sunshine. Gently pull away the mulch exposing the top of the plant, leaving the dirt, and base of plant covered with mulch. Often the garlic plant could be yellowish from not seeing the sun. It will turn to green as soon as the sun shines on it.
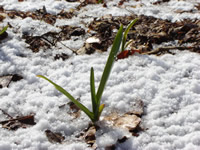
Susanville on Valentines Day
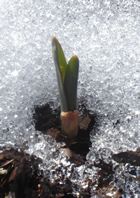
Susanville on Valentines Day
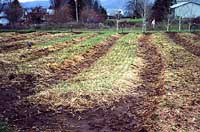
Four inches of growth.
March – SPRING
Got Garlic Order Placed?
Have you created your garlic seed wish list yet? Please get your order in before the crazy summer time rush! Due to the rising popularity of growing your own garlic, garlic seed sells out extremely fast. Please order soon, if you have not already placed your garlic seed order. Need help choosing your garlic seed? If you need help in choosing a variety you may call or email us for advice.
Weeding Garlic
In the garlic garden… Depending on your location, now is the time to begin weeding. Just keep an eye on your garlic. Make sure when you look at your garlic garden, you are growing garlic and not a lot of weeds.
At the end of March, your garlic plants will be ready for a foliage feed. Spraying garlic plants with a nice organic foliage feed will really benefit your crop. We use an assortment of fish, sea kelp and organic compost tea. We are now selling some really nice samples of instant compost tea from Wynbrandt Farms.
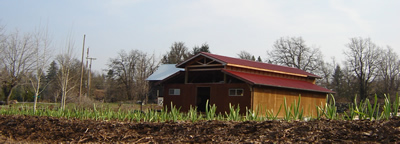
Hood River Garlic barn with new garlic growth
April
Irrigating Garlic
Depending on the weather, it’s time to prepare for irrigating garlic.Garlic likes to be wet in the spring for good growth. Unless Mother Nature has been watering garlic for you, it’s a good idea to water your garden yourself. Just remember to keep the soil moist during this growth period.
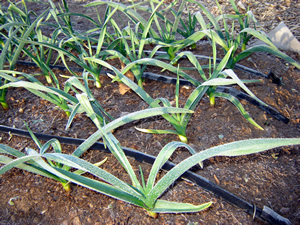
Garlic is very hardy and can handle a hard frost. April 4th
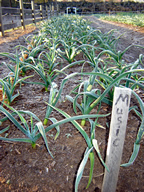
April frost
May
Garlic Scapes
Garlic will start to form flowers called “bulbils”. These bulbils grow on scapes. In order for your garlic to put the energy into the bulb, rather than the flower, it is necessary to snap off the garlic scape.
When the garlic scape begins to grow, it will be a tiny shoot coming from the center of the plant (see image on right) it will look different from the other leaves, because the leaves are flat and the scape is round with a pointy tip. The scape will start growing straight up to about 10 inches tall and 1/8 of an inch thick. Then it will take a U-Turn and start growing down. The next few days, it will begin to curl, when the scape gets into a full curl (when the flower meets the stem again) it will be ready to pop. This should be the end of May to mid June. After popping it off, you should have a scape at least 8 to 9 inches long (including the flower). Please note: they are called flowers, but they don’t look like flowers yet. Try this fun experiment and keep a few in tact and set in a jar without water. The scapes will actually bloom and there you will see the bulbils.
Do not discard your garlic scapes, you can eat them! Sauteed organic garlic scapes are wonderful when fresh. Chop scapes into 1/2 inch pieces up to flower, discard flower. Saute garlic scapes with some olive oil and chopped onion until tender. Sprinkle garlic scapes with Balsamic vinegar and enjoy! Eat your sauteed garlic scapes as a side dish or over pasta. See Garlic Recipes for some garlic scape recipes. Also add them to any dish of sauteed vegetables for garlic flavor. Garlic scapes are best eaten when they are young and tender. If you wait too long to pop them off the garlic plant they become tough and woody. The best time to eat them is when the scape has just started to curl and the flower is still enclosed.
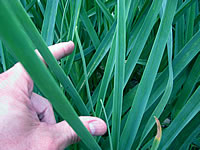
Garlic scapes are beginning to form. May 20th. photo credit Bernie Clark
June – SUMMER
The month of June is spent weeding, watering and popping garlic scapes while anxiously awaiting your wonderful garlic harvest. Harvest time is the best part of growing garlic, it is also the time when all of your garlic lover friends show up to help.
Harvesting Garlic
When the leaves of the garlic plant begin to turn brown from the bottom up, it’s getting closer to harvest. You want to harvest your garlic when the plant has three to four fairly strong green leaves remaining.
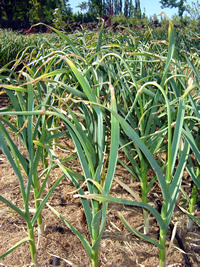
Garlic scapes are beginning to form. When they start to curl, it’s time to pop them off.
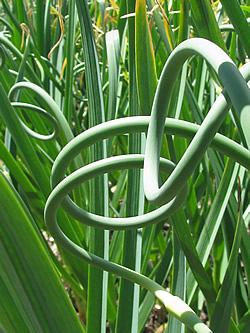
Garlic scape curled and ready to pop – mid June
July
Now is the moment you’ve been waiting for! Our Northwest garlic harvest annually begins around the fourth week of June for the early varieties and mid July for rest. Harvest garlic plants with three to four green leaves left. Don’t be alarmed if all the plants are not ready at the same time.
We harvest garlic using a tractor to undercut it and then we come behind and gently pull it with our hands. We make small piles of garlic in the field which get loaded into a pickup truck and then hung in our drying building. Be sure to not let the garlic be in the sun for more than a few minutes. The sun will burn it.
Home gardeners can harvest garlic one at a time with a shovel. Set the shovel far enough away from the bulb so the garlic doesn’t get nicked by the blade when coming out of the dirt. The force of the leverage on the shovel can sometimes scrape the outer skin of the bulb. We call these shovel hits. Its easier to have a second person gently pulling the garlic from the bed after its loosened with the shovel.
When the garlic comes out of the earth it will have a big clump of dirt attached. Brush dirt clump off (I like to wear gloves because otherwise the dirt sucks all the moisture out of my skin) softly, picking dirt balls out of the roots and set gently down on the ground. It is important not to bang bulbs together because it could cause bruising. Always handle your precious organic garlic with care. The garlic is tied into bundles of 5 to 8 plants, depending on the size. You want a string that is strong and you can really tie a good knot with. We use twine.
Curing Garlic
After you have tied your garlic into bundles, it’s time to hang it up to cure. Hang your garlic in a cool dark place, out of direct sunlight with good air circulation. It takes about 2-3 weeks for garlic to cure for the best flavor.
August
Cleaning Garlic
To know when to start cleaning your garlic, choose a test garlic and cut off the stalk about one inch from the top of the bulb.
We call this your test garlic because you are testing for moisture content. You want the stalk to be dry after the shears cut the stalk. You can test for dryness by gently squeezing the remaining one inch of stalk. If you see any moisture, the garlic is not quite ready for cleaning. We also hold it to our cheek to feel for any moisture.
Your garlic cleaning will have to wait if still wet, but now you can eat your test garlic!
Wait a few more days and try another test garlic. When the stalk is dry after cutting the stem, your garlic has been cured to perfection.
After cutting off the stalk, snip off the roots about 1/4 inch from the bottom of the bulb. Once the stalk and the roots are removed brush off any excess dirt, but be careful and leave the outer skin intact. This helps your garlic from drying out too much.
After harvesting your beautiful garlic, it is important to store it properly.
Storing Garlic
The garlic stores best in a cool dry place away from direct sunlight. Keeping it at a constant 50 – 55 degrees will help to store your garlic for a long time. Good air circulation is good; don’t store your garlic too deep in a tray or box, this will hinder your circulation around each bulb. Use a shallow tray and store the garlic one or two deep. (see photo above) We use clean, plastic nursery trays, with slotted bottoms. The plastic works well in the fall when there is more humidity. Cardboard may retain water and absorb into the garlic you store.
Eating Garlic
Now is the time you’ve been waiting for! You are rewarded by your bountiful harvest and ready to cook with all the wonderful organic garlic that you have grown from seed. See Recipe pages for great ideas about storing extra garlic.
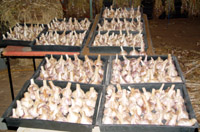
Garlic beautifully stored after roots and stems are cut. Always take extra caution to make sure varieties are kept separate.
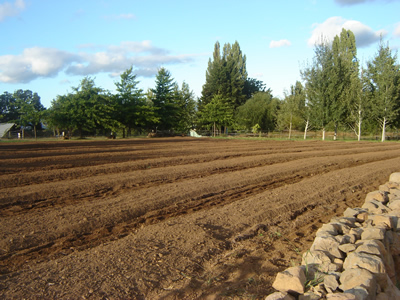
Freshly tilled garlic beds ready for Buckwheat cover crop
August 30
September
Organic Weed Control
After all your garlic is harvested, cleaned and hanging to cure, it is time to start getting your garlic beds ready for your new batch of organic seed to arrive from Hood River Garlic! We like to keep on top of next years’ weeds by getting rid of them, especially when they are loaded with seeds.
I have a lot of people ask us how we weed organically. All weeds are either pulled by hand or uprooted with our weeding implement on our tractor. Keeping your garden free of weeds is a good way to keep your garlic free of bugs and disease.
Flame weeding is another technique for organic weed control. Using a propane torch, flame weeding kills weeds by searing the leaves, causing the weeds to wilt and die. Be sure to have a hose handy and keep your fire under control.
October – Autumn
Choosing organic seed stock
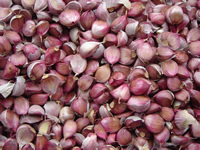
When your package of Hood River Garlic arrives, open the box immediately! Your garlic planting stock needs some fresh air after its journey to your garden. It is not necessary to break open or “pop” the bulbs until you are ready for planting garlic. Keep your organic garlic seed cool and dry until you are ready to plant. The box it arrived in is fine, just keep the box open. We wait until the day before planting to separate the cloves from the bulbs. Breaking apart the bulbs may cause some skin to fall off the cloves. Please note; It is not necessary to peel the garlic cloves before planting. It is however OK if skin falls off on a few cloves, you just don’t want the clove exposed for too long before planting garlic. To break open bulbs: Take the whole bulb into one hand and use the other hand to break the cloves apart from each other. I like to wear gloves because it takes a lot of strength.
When sorting your organic garlic seed, choose only the largest cloves per bulb for planting garlic. Save the small cloves to eat. The variety of garlic you are planting will determine how many cloves you yield per bulb. IE: Chesnok Red has 10-12 cloves per bulb, with large outer cloves and small inner cloves. Siberian is a personal favorite because the cloves are huge. Remember, the bigger the seed, the bigger the plant will become.
The night before planting, we soak our popped garlic overnight in a seaweed tea which gives it a boost of nutrition and helps the roots grow faster. We make our seaweed tea using dried kelp flakes placed in water. You can also use a liquid concentrate of fish/kelp fertilizer. There is normally a seed soak ratio on the bottle.
Preparing beds
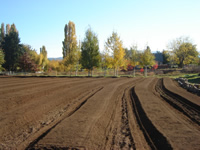
Preparing the beds for planting garlic is very important to grow nice sized bulbs. There are many different ways to add organic matter into your garden. You can add compost, manure, decomposed leaves, straw, etc. You can also add a good fertilizer blend. We add a 7-2-1 blend of organic poultry manure. Garlic likes a higher nitrogen fertilizer when planted. Once added, till into your beds and your soil will be ready for planting garlic. Some customers put a little bone meal in each garlic hole.
Planting Garlic
Now that you have sorted out all the largest garlic seed stock and the beds are prepped, you are ready for planting garlic! As a rule of thumb, here in the Northwest, we start planting garlic around Halloween. You don’t want to wait too long into November, because the garlic seed likes to be in the ground before it freezes.
Ready for planting
Planting garlic too early can allow the plants to start growing. Planting garlic takes place between Halloween and Thanksgiving. We have planted in some pretty frosty beds before and it is just a little uncomfortable for the planter. The garlic will be fine, just give it a good pat into the earth, and cover it nicely with a blanket of mulch. We have planted while its snowing and while its been in the 60’s.
Right before planting (after the overnight seaweed soak) we soak our seed in 90% Rubbing Alcohol as a precaution to kill any pathogens that may be present on the clove. We soak it for 10 minutes and plant immediately after.
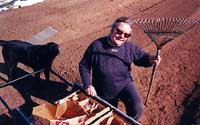
Plant garlic cloves one at a time, right side up (pointy ends up). You want to push the garlic seed into the dirt about 3-4 inches into the earth, allowing 2 inches of dirt covering the tip of the clove. Allow 3 inches in colder climates. I take a clove between my thumb and forefingers and push down, pushing down the length of my thumb. Pull out your hand, pat down the dirt and you’ve planted your first organic garlic seed! HINTS- Vinyl gloves work great for planting garlic. They are thin enough to feel the cloves, ensuring that you are planting tips up!
Mulching Garlic
Mulch the garlic for the winter after tucking all your organic garlic seed into its winter bed. It likes a nice blanket of mulch. Old partially decomposed leaves work great, old seedless straw is also a great mulch. Spread mulch about six inches thick. A good snow cover works well too.
November
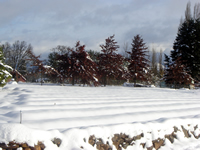
In late October, 2022, we planted our garlic field in T-shirts, but just 2 weeks later, it was covered in 3 feet of snow. It varies from year to year depending on the weather pattern. Many people contact me in November and December asking if it is too late for planting garlic. You can plant as late as needed. Our friend has planted over 20 pounds in January for the last two years. You will want your garlic to be in the ground for 9 months to reach it’s fullest maturity. So if you have garlic seed, plant it! If your fields are not covered with snow, it’s a good idea to keep an eye out for voles, moles and gophers, these rodents can put a damper on your garlic harvest if they become a problem. As far as organic rodent control, try a big hungry outdoor cat. Sonic gopher deterrents are available at your local hardware and garden store as well.
December
Growing Garlic
Now it is time to kick back and wait for spring. December is an easy month for growing garlic. There is nothing to do but think about your wonderful garlic harvest six or seven months away.
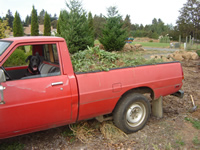
A truckload of weeds!
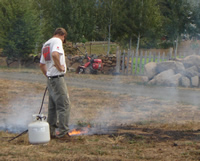
Flame weeding
Save Hood River Garlic URL in your Favorites section of your Browser. Buy your next year’s organic seed garlic farm-direct from Hood River Garlic
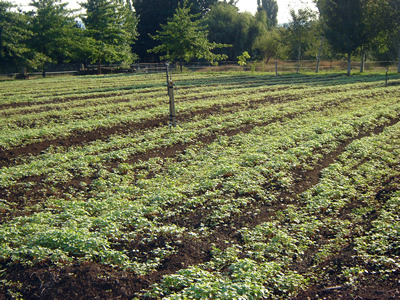
Main garlic field with cover crop of Buckwheat
September 6, 2006
